Building a PowerShell cmdlet using C# - Part 1: Basic Code and Requirements
As PowerShell evolved, it gave administrators more are more options when creating functions. The latest addition in PowerShell 5 was classes which along with the ability to use .NET classes allows us to build functions for even the most complicated tasks.
The use of classes and .NET objects however is much easier in C# and the fact that the code is faster and strongly typed makes C# a better choice when building complicated functions. In this article, we are going to create a cmdlet using Visual Studio. Let's get started!
Fire up Visual Studio and create a Class Library project:
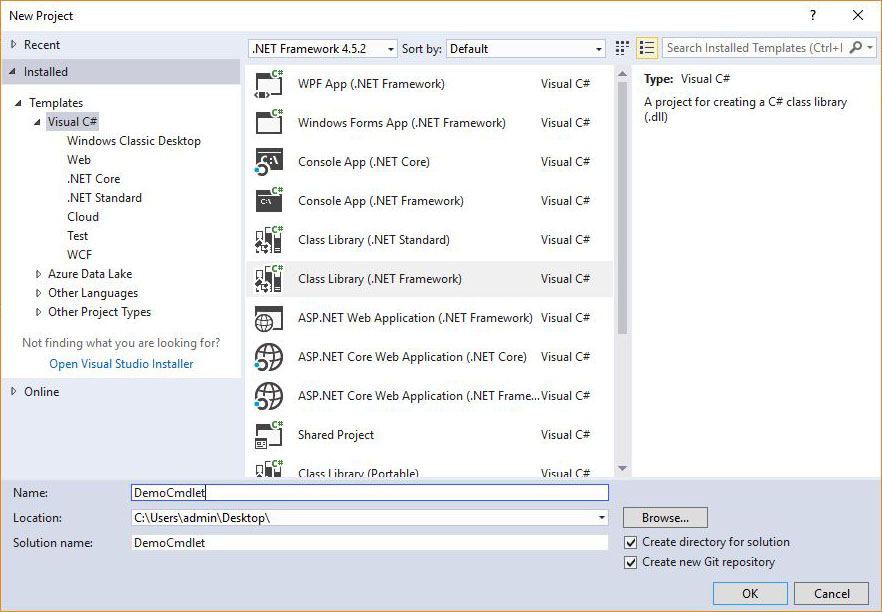
When the project is created, it will contain a class file that is going to hold the code for our cmdlet.

Before starting to write the code, we have to add a package that will provide all the necessary tools to create the cmdlet. Right click the solution in the Solution Explorer and select "Manage NuGet Packages for Solution".

When the package manager tab has opened, click "Browse" and search for "Microsoft.PowerShell" to get the reference assembly packages. Select the version based on the PowerShell version your are developing, select the project on the right and install the package. If you're developing for older PowerShell version, you also have to adjust the .Net version of your project accordingly.

Now that we have the package installed, let's move on with the updates on the class. Start by adding a using statement for "System.Management.Automation". This will allow you to configure your class to inherit from the PSCmdlet class. The last step is to add the name of the cmdlet as an attribute to the class. There are many common verbs available, but you may also use one of your own.

As with advanced script cmdlets, there are three functions you can override: "BeginProcessing", "ProcessRecord" and "EndProcessing". Those are the equivalents of "Begin", "Process" and "End" blocks in a function.

The last thing missing from our cmdlet is the parameters. The syntax is very similar to the one used in functions:

Here we have a string variable named id that is going to hold the value provided via the parameter.
On the next article of the series, we'll see how you can debug the code in the cmdlet. Till then, have full!
The use of classes and .NET objects however is much easier in C# and the fact that the code is faster and strongly typed makes C# a better choice when building complicated functions. In this article, we are going to create a cmdlet using Visual Studio. Let's get started!
Fire up Visual Studio and create a Class Library project:
When the project is created, it will contain a class file that is going to hold the code for our cmdlet.
Before starting to write the code, we have to add a package that will provide all the necessary tools to create the cmdlet. Right click the solution in the Solution Explorer and select "Manage NuGet Packages for Solution".
When the package manager tab has opened, click "Browse" and search for "Microsoft.PowerShell" to get the reference assembly packages. Select the version based on the PowerShell version your are developing, select the project on the right and install the package. If you're developing for older PowerShell version, you also have to adjust the .Net version of your project accordingly.
Now that we have the package installed, let's move on with the updates on the class. Start by adding a using statement for "System.Management.Automation". This will allow you to configure your class to inherit from the PSCmdlet class. The last step is to add the name of the cmdlet as an attribute to the class. There are many common verbs available, but you may also use one of your own.
As with advanced script cmdlets, there are three functions you can override: "BeginProcessing", "ProcessRecord" and "EndProcessing". Those are the equivalents of "Begin", "Process" and "End" blocks in a function.
The last thing missing from our cmdlet is the parameters. The syntax is very similar to the one used in functions:
Here we have a string variable named id that is going to hold the value provided via the parameter.
On the next article of the series, we'll see how you can debug the code in the cmdlet. Till then, have full!

