Configuring Virtual Machines Using Desired State Configuration - Part 6 - Azure Automation
Continuing the post series about Microsoft DSC and a long break from Azure Global, we are going to see how Azure Automation Accounts help with DSC configurations on Azure Virtual Machines.
First, we are going to deploy an automation account and then we're going to register a Windows Server VM to it so that it gets and applies our configuration.
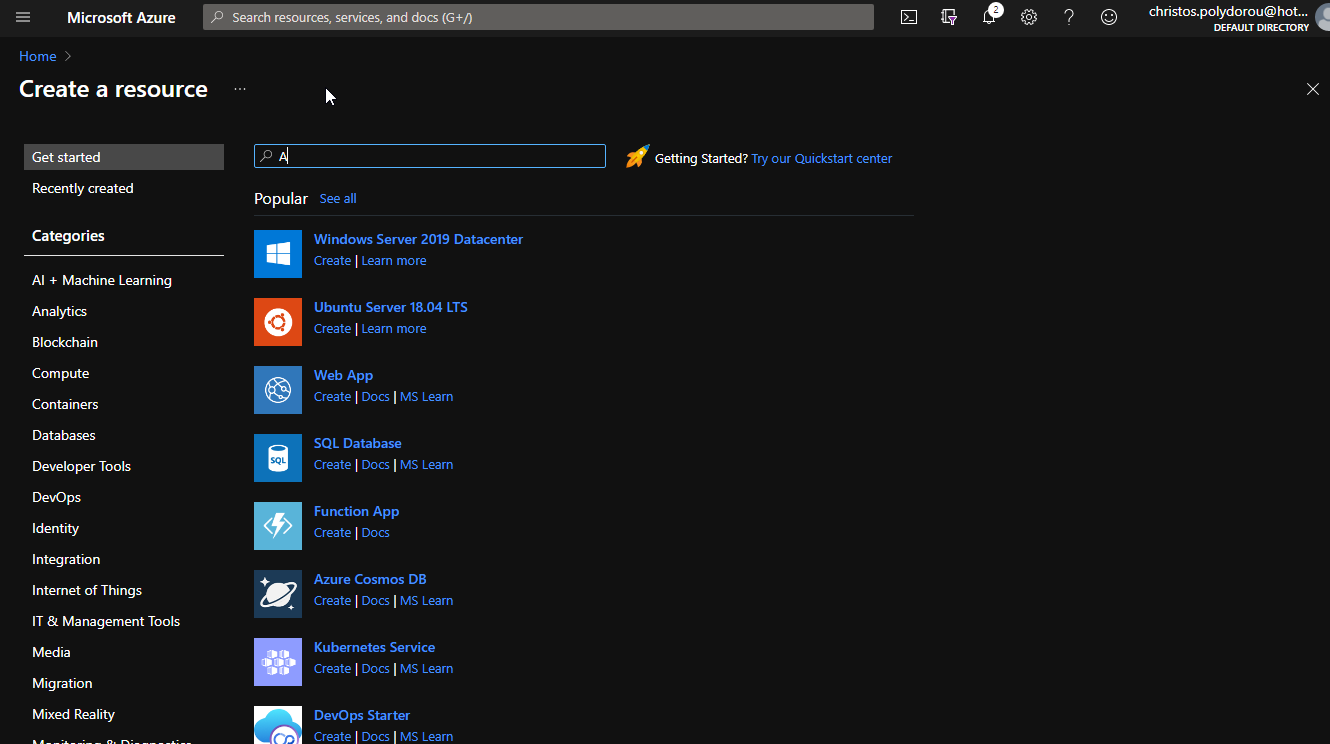
To deploy an Automation Account, navigate to the Azure Portal and search for "Automation". Select the Automation offering from Microsoft and click "Create". You will then have to select a name for your automation account, the subscription and resource group to deploy to and the location. When done with the deployment options, hit create to submit the deployment.
The process should be much like the following (hover to animate):
Now that we have created an Automation Account, we need to upload and compile a configuration, so that it can be made available to the nodes we're going to add later on.
On the Automation Account page, navigate to the "State Configuration (DSC)" blade and then click on "Configurations". Select the "Add" option and browse to the "WebApp004.ps1" file that you'll find in my Github repository. This configuration file is nothing more than the file we have been using in the previous posts, but without the file copy part since we do not have a file server on Azure. Hit the OK button to upload the configuration file.
Now that the file is uploaded, we have to compile it. Open the configuration from within the storage account and click the "Compile" button. This will start the compilation job that may take a while to complete. Once it's over, the configuration should also appear under the "Compiled Configuations" pane.
The configuration has now been compiled and is available to be assigned to any nodes.Starting from the Automation Account's overview page, we need to switch to the "State Configuration (DSC)" blade and then click on "Add", making sure that we're on the "Nodes" tab. This will open the node add page where we can find our virtual machine. Click on the virtual machine and then hit "Connect" to register it to the automation account. A new window appears where we need to set the settings of the LCM on the machine. The most important setting here is the name of the configuration. Selecting "OK" starts the process of adding the extension to the virtual machine. When it's over, the virtual machine should appear in the nodes list of the automation account and hopefully configured and compliant!
I've left the name of the configuration the same with the original file on purpose, to show you that the name of the configuration on the storage account is taken from the configuration block and not the name of the file. Even though we uploaded a file named "WebApp004.ps1" the configuration was named "WebApp001".
This concludes the process of creating an automation account and registering a virtual machine to it. However, the automation account has a few more DSC related features that are very important:
Credentials, Connections, Certificates and Variables allow you to save information on the automation account and use it from within your configurations at runtime.
Credentials
You can save sensitive information like usernames and password in credential objects and retrieve it at runtime when the configuration is being applied. Usual examples are credentials to join a jomain or access a service. To get the credentials use the Get-AutomationPSCredential cmdlet in your configurations.
Connections
Connections can contain information to be used when connecting to other applications and services and can contain multiple fields, to avoid excesive use of variables. To get a connection use the Get-AutomationConnection cmdlet.
Certificates
Certificates used to secure communications and also authenticate endpoints so you're most probably going to have to install a number of certificates on your machines. To get the certificate from the automation account, use the Get-AutomationCertificate cmdlet.
Variables
You can store variables in the automation account to make your configurations flexible. For example, you can save the name of the Active Directory domain to join as a variable and avoid hard-coding it in your configurations. You can get variables using the Get-AutomationVariable cmlet in your code.
You will also have to update your storage account with modules other that the default, in order to apply configurations for components that are not included by default. For example, you may need the xStorage module in order to configure the disks on your machines. The modules functions below give you the ability to add the needed modules.
Modules
From the modules blade you can upload your own modules, or modules that are not available in the gallery.
Modules Gallery
Since the majority of the modules we use in our configurations are published to the Gallery, this blade allows us to query the gallery and import the modules we need from a single interface.
The automation account resource has much more functionality related to automation than what we've touched today, I suggest you deploy one and start expirimenting. And don't forget, you can register your on-premises machines to the automation account as well!
The configurations used in this article are available in my Github repository here. A lot of the functionality described above is implemented as part of my automation Active Directory environment deployment on Azure and is available here.
Stay tuned for the next article of the series that's going to be about building your own modules!
Related Articles


