Protecting AppService using Front Door
Starting with the fact that every web application should be protected by a Web Application Firewall (WAF) and accelerated using a Content Delivery Network (CDN), combined with the simplicity of the deployment of the Azure Front Door service, gives you no excuses for not protecting your apps!
In this blog post, we're going to deploy an AppService and protect it using Azure Front Door. For the purposes of this demo, we're going to use the NodeJS - RequestInformation app that is available in my Github repo over here. This application provides information on the platform and incoming requests that is going to be very handy later on.
To deploy the demo resources, you just have to clone this repository, change to the FrontDoor-AppServiceBackend-001/101-Bicep-Templates/900-IaC-FullDeployment-001 directory, and execute the deploy.sh script. The script will create a subscription-level deployment that will deploy an AppService (including the plan) and an Azure Front Door. Make sure you are logged in and you have selected the right subscription!
The completed deployment should look like the below:
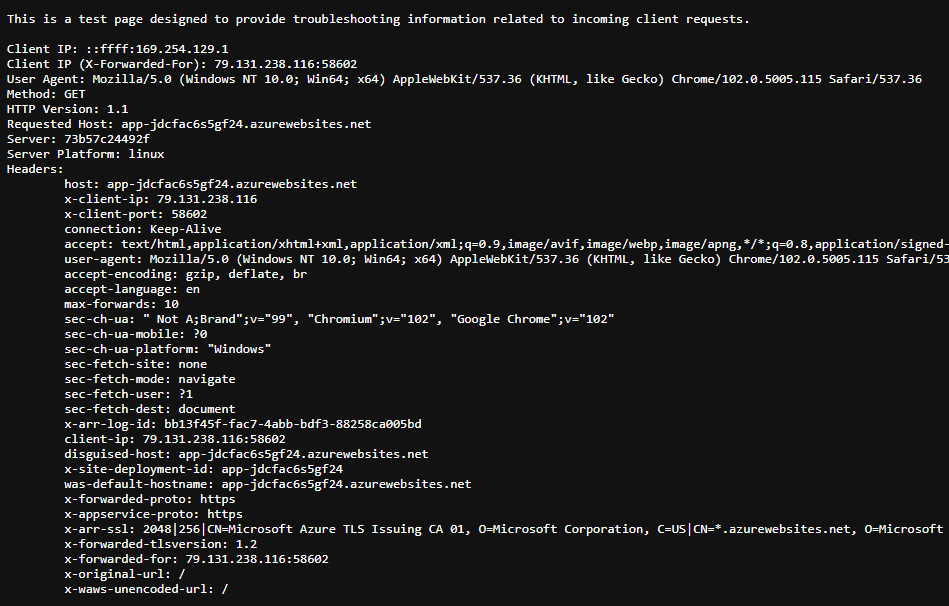
If you open up the Overview page of the AppService and browse the app, you'll get something similar to the below:
It may take some time for AppService to download the container image and create the container, so don't be alarmed if the first request takes too long to complete. You can monitor the process in the logs section of the deployment center:
Part of the Bicep deployment is also the creation of an Azure FrontDoor resource and the configuration to use the AppService as a backend:
If you browse the endpoint created as part of the Front Door configuration you'll get the same page, however, there are a few changes and additional headers:
In case Front Door shows an error, give it some time to connect to the AppService, it usually takes a couple of minutes.
At this point, the configuration on DNS should direct all the requests targeting the AppService to Front Door. The AppService however is still reachable using its IP or URL and we have to find a way to allow traffic only from the Front Door services, and even better, only our Front Door instance.
Hopefully, AppServices provide the ability to restrict inbound traffic based on a number of conditions, including source IPs, Service Tags, and Headers.
Switch to the Networking blade of the AppService and click on the Access Restriction option under Inbound Traffic as shown below:
In the Access Restrictions page, you have the ability to create rules and control inbound traffic. We're going to create two rules:
- one that will allow traffic from our Front Door instance, and
- one that will allow direct traffic from a public IP for troubleshooting purposes.
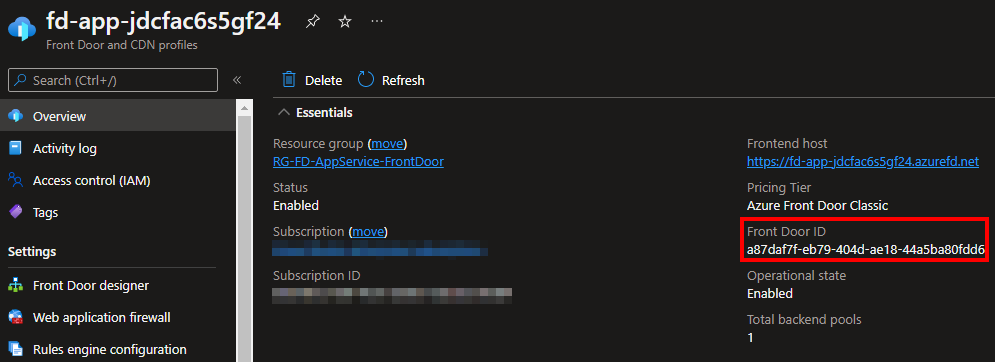
Starting with the first rule, we are going to use an Allow action with Service Tag type and the AzureFrontDoor.Frontend tag. The value for the X-Azure-FDID header should be the id of the Front Door resource, taken from the Overview page:
Your rule should be similar to the below:
If you take a closer look, the id shown on the above page matches the value of the X-Azure-FDID header in the second request, since the request went through Front Door!
At this point, the application should be available only via Front Door. If you try to access it directly, you should get a message that access is forbidden:
The second rule is a bit easier to implement, you just have to allow access from your public IPs using the source settings on the rule:
You should end up with three rules in total, the two that you have created and the default deny all that is created by Azure:
That's it, your AppService is now protected by Azure Front Door!


