Passing information between Azure DevOps Pipelines using Powershell
In this article, we are going to examine one of the possible ways to transfer information from an Azure DevOps build pipeline to a release pipeline. The goal is to pass variables with information created during the execution of the build pipeline to the release pipeline. To accomplish this, we are going to use Powershell to create a build artifact that will contain all the variables needed, and then we'll consume it from the release pipeline.
Starting with the build pipeline, we'll be using the classic bicep deployment that has outputs. This is the information that we would like to have available in the release pipeline. Think of a WebApp that is created by the build pipeline and we need its resource group and name in order to publish our code to it.
First, let's go through the steps of the build pipeline. We have three steps in total, the azure deployment, the conversion of its outputs to variables, and finally the creation of the artifact.
There is nothing sophisticated about the deployment of the bicep file in the first step, it is just an Azure CLI command that collects the output and creates a pipeline variable from it:

1 2 3 4 5 | # Submit the deployment $result = az deployment sub create --location westeurope --template-file main.bicep # Save the output as a pipeline variable Write-Output("##vso[task.setvariable variable=bicepDeploymentOutputs;]$result") |
More details on how to deploy a bicep template are available in my previous post over here.
The next step is where we create the artifact. We are going to create a hash table object that will be populated with the variables that we are going to parse from the output of the bicep deployment. We just need a Powershell step and the below code:

1 2 3 4 5 6 7 8 9 10 11 12 13 14 15 16 17 18 19 20 | # Convert the output from JSON $deploymentOutput = '$(bicepDeploymentOutputs)' | ConvertFrom-Json # Create a hash table to hold the variables to be exported $myVariables = @{} # Loop through the output and create variables foreach($output in ($deploymentOutput.properties.outputs | %{ $_.psobject.properties.name })) { $name = $output $value = $deploymentOutput.properties.outputs.$name.value Write-Host ("Adding variable '" + $name + "' with value '" + $value + "'.") Write-Host "##vso[task.setvariable variable=$($name)]$($value)" $myVariables.Add($name, $value) } # Export the hash table array to file $myVariables | Export-CliXml -Path $(Build.ArtifactStagingDirectory)\BuildOutput.xml |
Let's go through the code line by line.
On line 2 we get the value of the pipeline variable that holds the output of the bicep deployment.
The object we create in line 5 is the hash table that will contain the information to be exported to the artifact.
In the foreach loop, we iterate through the outputs and add a key/value pair to the hashtable (line 16).
When all the outputs have been processed, we use the Export-CliXml cmdlet to export the hash table object to a file in the artifact staging directory.
Now that the file has been created, we need to publish it as an artifact. The step should look similar to the below:
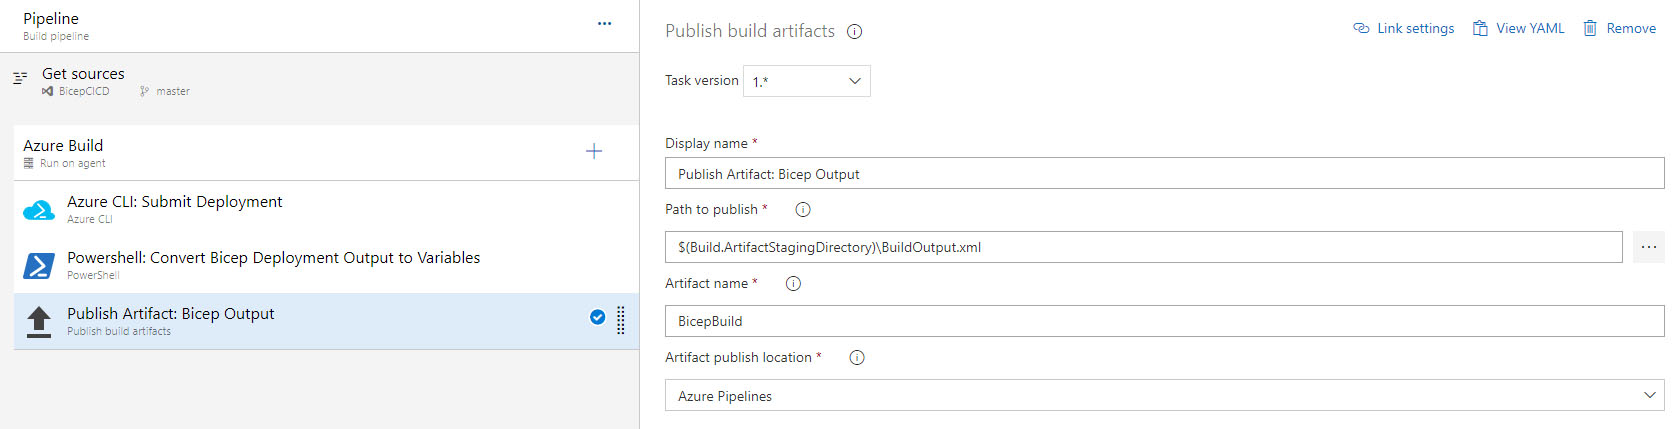
The key points here are the Path to publish which is the path to our file and the Artifact name that we are going to use in the release pipeline.
When you run the pipeline, it should create an artifact just like below:

Moving on to the release pipeline, we have two steps that are required in order to get the information, the artifact download and the import of the XML file.
Downloading the artifact is fairly simple, we just need to add the appropriate step and configure the Destination directory. I did not add any filter on the files or artifacts since we just have one:


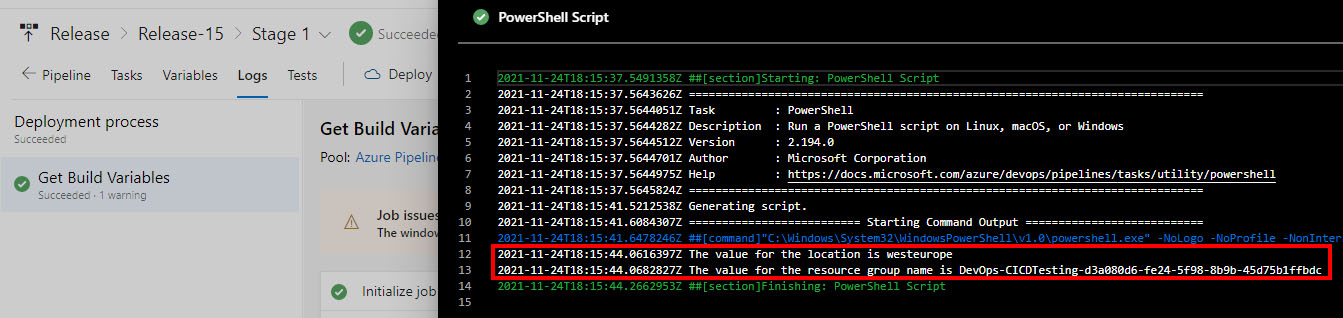
1 2 3 4 5 6 | # Import the variables from the file $myBuildVariables = Import-CliXml -Path $(System.ArtifactsDirectory)\BicepBuild\BuildOutput.xml # Output the variables for troubleshooting purposes Write-Host "The value for the location is $($myBuildVariables.location)" Write-Host "The value for the resource group name is $($myBuildVariables.resourceGroupName)" |
Line 2 is where the magic happens, with importing the artifact file. Note that you have to add the artifact name to the path since a specific folder is created for it when it is downloaded during the previous step.
Taking a closer look in the logs, we see that the file has been successfully parsed:
The information from the build pipeline is now available in the release pipeline and you can handle it according to your pipeline design and strategy!

